Metroスタイルアプリケーションのタイルに数値のバッジを表示させるコードを紹介します。
Metro UIのスタート画面のStoreのタイルの右下には更新のあるアプリの下図が表示されます。この右下の数値を表示させるコードを紹介します。

まず、150×150 pixelのアプリケーションのタイルを作成します。今回は下図の画像を用意しました。

UI
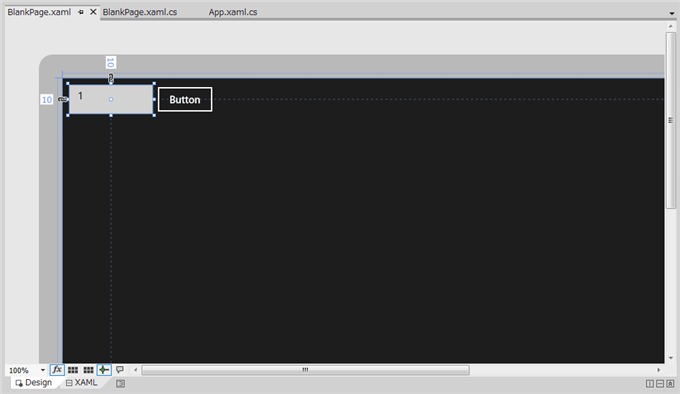
下図のUIを準備します。テキストボックス1つとボタンを1つ配置します。
アプリケーション設定
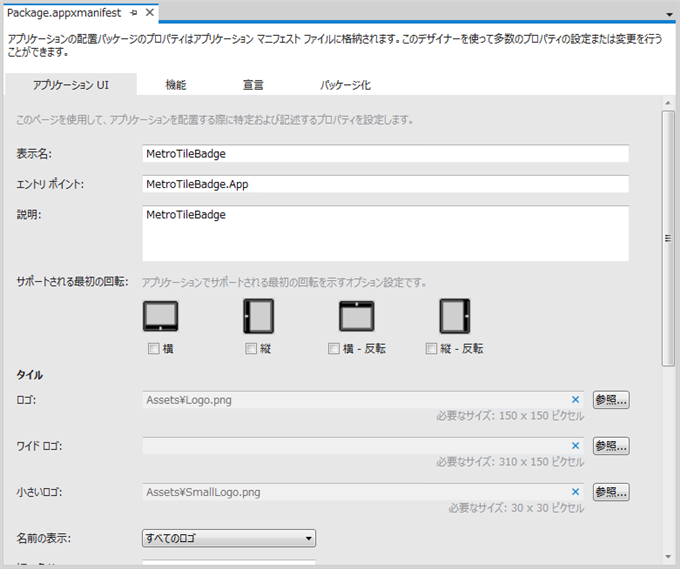
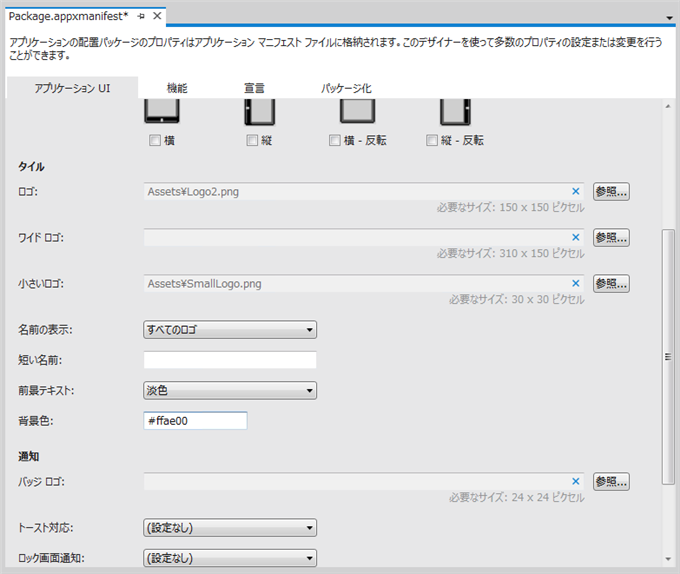
続いて"Package.appxmanigest"ファイルを開きます。下図の設定画面が表示されます。
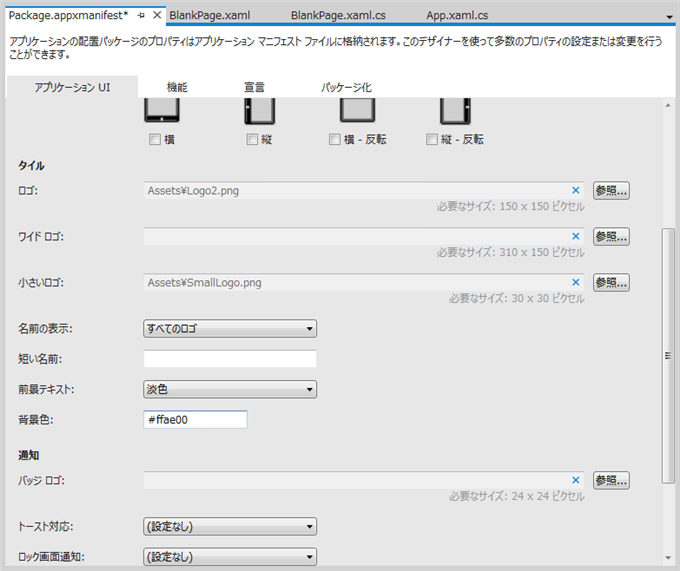
[タイル]セクションの[ロゴ]の欄のロゴ画像を変更します。先に用意したタイル画像をAssetsディレクトリにLogo2.pngとして配置し、その画像を[ロゴ]に設定します。
コード
下記のコードを記述します。実質はusingの追加とボタンのClickイベントハンドラを記述します。
using System;
using System.Collections.Generic;
using System.IO;
using System.Linq;
using Windows.Foundation;
using Windows.Foundation.Collections;
using Windows.UI.Xaml;
using Windows.UI.Xaml.Controls;
using Windows.UI.Xaml.Controls.Primitives;
using Windows.UI.Xaml.Data;
using Windows.UI.Xaml.Input;
using Windows.UI.Xaml.Media;
using Windows.UI.Xaml.Navigation;
using Windows.UI.Notifications;
using Windows.Data.Xml.Dom;

// The Blank Page item template is documented at http://go.microsoft.com/fwlink/?LinkId=234238

namespace MetroTileBadge
{
  /// <summary>
  /// An empty page that can be used on its own or navigated to within a Frame.
  /// </summary>
  public sealed partial class BlankPage : Page
  {
    public BlankPage()
    {
      this.InitializeComponent();
    }

    /// <summary>
    /// Invoked when this page is about to be displayed in a Frame.
    /// </summary>
    /// <param name="e">Event data that describes how this page was reached.  The Parameter
    /// property is typically used to configure the page.</param>
    protected override void OnNavigatedTo(NavigationEventArgs e)
    {
    }

    private void Button_Click_1(object sender, RoutedEventArgs e)
    {
      XmlDocument content = new XmlDocument();

      int val = Convert.ToInt32(textBox1.Text);
      string doc = string.Format("<badge version=\"1\" value=\"{0:d}\"/>", val);
      content.LoadXml(doc);

      BadgeNotification badgeNotification = new BadgeNotification(content);
      BadgeUpdater badgeUpdata = BadgeUpdateManager.CreateBadgeUpdaterForApplication();
      badgeUpdata.Update(badgeNotification);

    }
  }
}
解説
バッジの更新は以下の手順になります。
- BadgeNotificatoinに設定する XmlDocumentのインスタンスを作成します。
- XmlDocumentインスタンスにXMLを設定します。今回はLoadXmlメソッドを用いています。
- BadgeNotificationクラスのインスタンスを作成します。コンストラクタの引数にコンテンツ(XmlDocumentのインスタンス)を指定します。
- BadegeUpdateMangerクラスのCreatBadgeUpdaterForApplication()メソッドを呼び出し、BadegeUpdaterのインスタンスを取得します。
- BadgeUpdaterクラスのUpdateメソッドを呼び出しバッジを更新します。
アプリケーションの実行
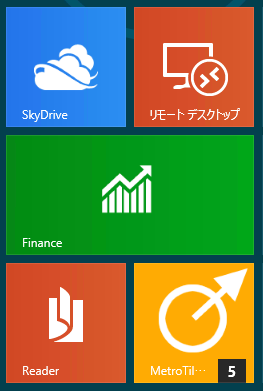
アプリケーションを実行し、スタート画面を表示します。アプリケーションのタイルが表示されます。

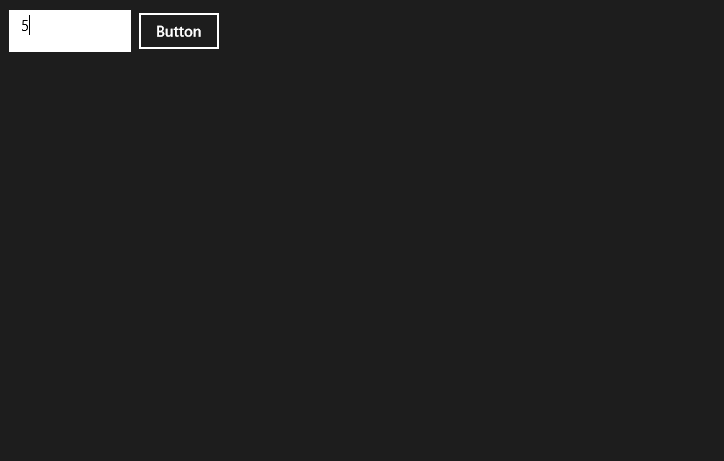
タイルをクリックし、アプリケーションの画面に切り替えます。テキストボックスに数値を入力し、ボタンを押します。
スタート画面に戻ります。タイルに数値のバッジが表示されました。ただし、背景が黒です。最初の[ストア]のタイルのように背景をタイルと同じ色にしたいです。
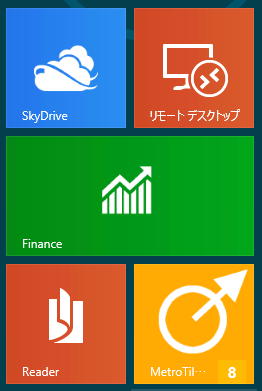
タイルの背景色は"Package.appxmanigest"ファイルの[タイル]セクションの[背景色]で設定できます。背景色を"#FFAE00"に変えて実行します。
バッジの数値表示部分の背景色が変更できました。
著者
iPentecのメインプログラマー
C#, ASP.NET の開発がメイン、少し前まではDelphiを愛用
最終更新日: 2024-01-06
作成日: 2012-03-18
