Metro Styleのアプリケーションでスタート画面のタイルにメッセージを表示する方法を紹介します。
タイルのグラフィックス作成
アプリケーションのタイル画像を作成します。タイル画像は通常のサイズとワイドサイズの2つを作成します。
150×150のタイル画像

310×150のワイドタイル画像

タイルの設定
Metro Styleアプリケーションプロジェクトを新規作成します。先に作成したタイル画像をAssetsディレクトリに追加します。
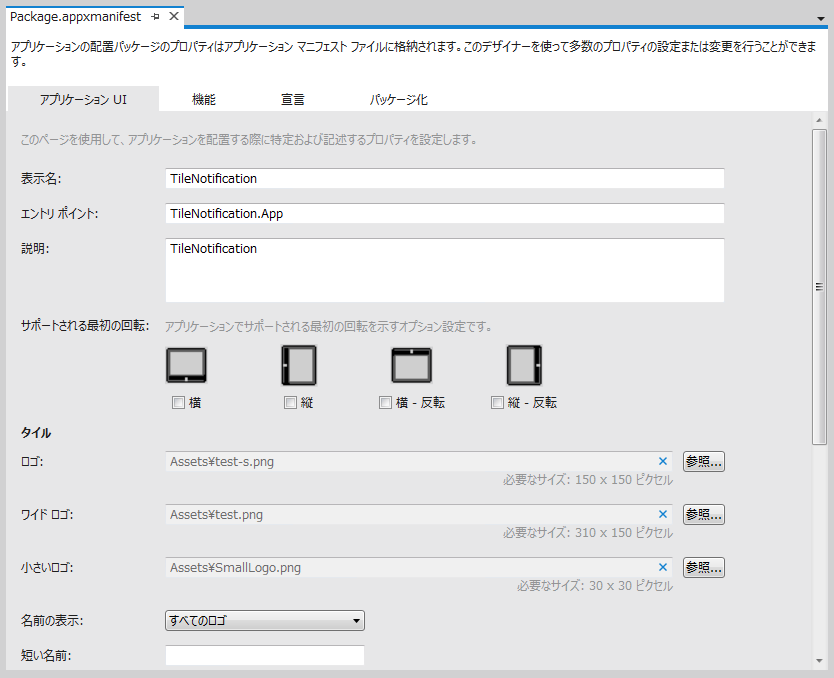
Package.appxmanifestファイルを開きます。下図の編集画面が開きますので、[アプリケーションUI]タブを選択し、[タイル]セクションの[ロゴ]に150×150のタイル画像を[ワイドロゴ]に310×150のタイル画像を設定します。
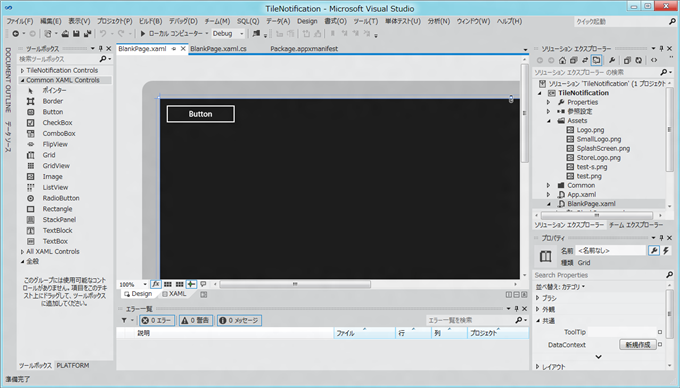
BlankPage.xamlを開きます。フォームデザイナ画面が表示されます。ツールボックスからButtonを選択しフォームに貼り付けます。(下図参照)
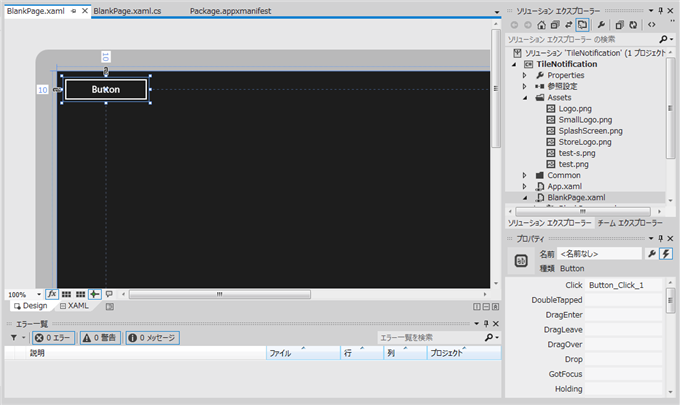
フォームデザイナに貼り付けたボタンをクリックして選択し、右下のプロパティウィンドウの稲妻のアイコンのボタンをクリックしてイベント一覧を表示します。イベント一覧の[Click]イベントの右側のテキストボックスでダブルクリックをしイベントハンドラを作成します。
作成されたイベントハンドラ"Button_Click_1"に以下のコードを記述します。
コード
using System;
using System.Collections.Generic;
using System.IO;
using System.Linq;
using Windows.Foundation;
using Windows.Foundation.Collections;
using Windows.UI.Xaml;
using Windows.UI.Xaml.Controls;
using Windows.UI.Xaml.Controls.Primitives;
using Windows.UI.Xaml.Data;
using Windows.UI.Xaml.Input;
using Windows.UI.Xaml.Media;
using Windows.UI.Xaml.Navigation;
using Windows.UI.Notifications;
using Windows.Data.Xml.Dom;

namespace TileNotification
{
  /// <summary>
  /// An empty page that can be used on its own or navigated to within a Frame.
  /// </summary>
  public sealed partial class BlankPage : Page
  {
    public BlankPage()
    {
      this.InitializeComponent();
    }

    /// <summary>
    /// Invoked when this page is about to be displayed in a Frame.
    /// </summary>
    /// <param name="e">Event data that describes how this page was reached.  The Parameter
    /// property is typically used to configure the page.</param>
    protected override void OnNavigatedTo(NavigationEventArgs e)
    {
    }

    private void Button_Click_1(object sender, RoutedEventArgs e)
    {
      XmlDocument content = new XmlDocument();
      string doc = "<title><visual version=\"1\" lang=\"en-US\">"
        + "<binding template=\"TileWideText01\">"
        + "<text id=\"1\">Hello World!</text>"
        + "</binding>"
        + "</visual></title>";
      content.LoadXml(doc);

      Windows.UI.Notifications.TileNotification tileNotification
        = new Windows.UI.Notifications.TileNotification(content);

      TileUpdater tileUpdater = TileUpdateManager.CreateTileUpdaterForApplication();
      tileUpdater.Update(tileNotification);
    }
  }
}
解説
タイルへのメッセージは以下の手順で表示します
- XmlDocumentのインスタンスを作成
- XmlDocumentのインスタンスにタイルにメッセージを表示するXMLドキュメントを設定。今回はLoadXmlで文字列の内容をXmlDocumentのインスタンスに設定しています。
- TileNotificationクラスのインスタンスを作成、コンストラクタにタイルに表示するコンテンツを設定します。コンテンツはXmlDocumentクラスのインスタンスである必要があります。
- TileUpdateMangerのCreateTileUpdateForApplicationメソッドを呼び出しTileUpdaterを取得します。
- TileUpdaterのUpdateメソッドにTileNotificationクラスのインスタンスを与えて呼び出すことでタイルにメッセージの表示ができます。
タイルにメッセージを表示するXMLは以下です。
<title>
  <visual version="1" lang="en-US">
    <binding template="TileWideText01">
      <text id="1">Hello World!</text>
    </binding>
  </visual>
</title>
3行目のbindingタグで指定するtemplateにはテンプレートの名前を指定します。テンプレートの名前はあらかじめ組み込まれており、TileTemplateType列挙型にある名前です。
アプリケーションの実行
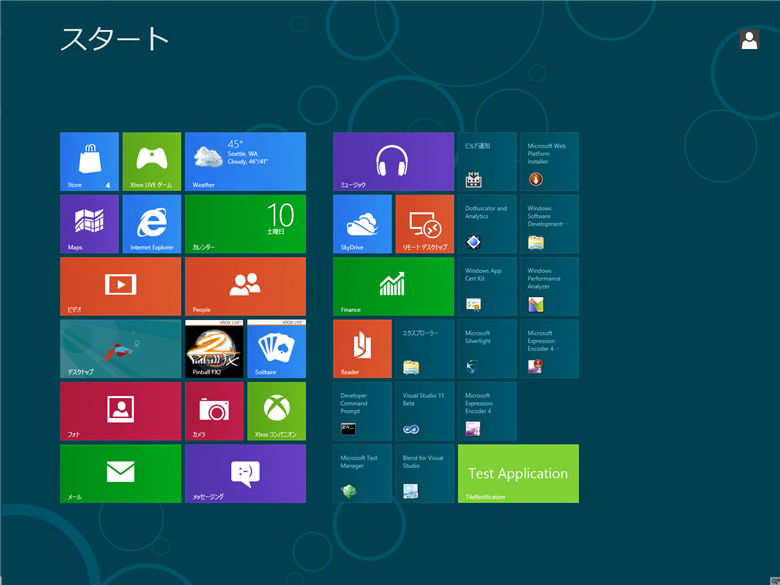
アプリケーションを実行します。実行するとBlankPage.xamlで編集した画面が表示されますので、[Windowsキー]を押してスタート画面に戻ります。スタート画面に作成したアプリケーションのタイルが表示されます。(下図画面右下のタイル)
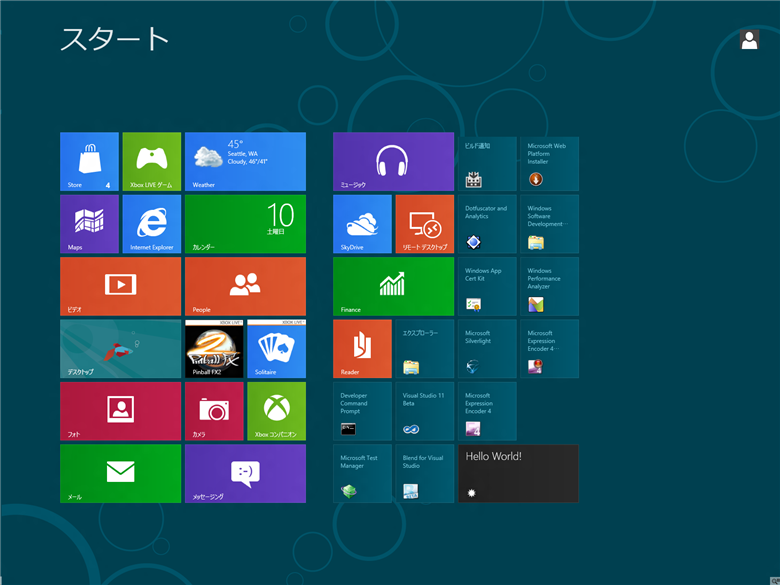
[Test Application]のタイルをクリックしアプリケーションの画面(BlankPage.xamlの画面)に戻ります。先程実装したButton1をクリックし、その後[Windowsキー]を押してスタート画面に戻ります。スタート画面に戻るとアプリケーションのタイルが変化し、"Hello World!"のメッセージがタイルに表示されます。(下図参照)
サブメッセージの追加
Button_Click_1のイベントハンドラのdoc変数の内容を変更します。
string doc = "<title><visual version=\"1\" lang=\"en-US\">"
  + "<binding template=\"TileWideText01\">"
  + "<text id=\"1\">Hello World!</text>"
  + "</binding>"
  + "</visual></title>";
string doc = "<title><visual version=\"1\" lang=\"en-US\">"
  + "<binding template=\"TileWideText01\">"
  + "<text id=\"1\">Hello World!</text>"
  + "<text id=\"2\">ようこそMetroの世界へ!</text>"
  + "</binding>"
  + "</visual></title>";
text id=2 の要素でテキストを追加しました。
アプリケーションを実行すると下図のメッセージが表示されます。

Metroアプリのタイルにメッセージを表示できました。
著者
iPentecのメインプログラマー
C#, ASP.NET の開発がメイン、少し前まではDelphiを愛用
最終更新日: 2023-12-11
作成日: 2012-03-10
