Metroスタイルアプリケーションでスタート画面のタイルに画像を表示する方法を紹介します。
準備
タイルに表示させる画像と、アプリケーションのタイル画像を準備します。
アプリケーションのタイル画像
アプリケーションタイル画像 (通常タイル用)
150×150 Pixelの画像を用意します。今回は下図の画像を用います。

アプリケーションタイル画像 (ワイドタイル用)
310×150 Pixelの画像を用意します。今回は下図の画像を用います。

作成したタイル画像はMetroアプリケーションのプロジェクトのAssetsディレクトリに配置します。配置後"Package.appxmanifest"ファイルを編集し、タイル画像を作成した画像に変更します。
タイルに表示させる画像 (ワイドタイル用)
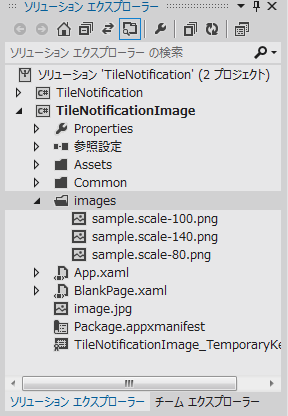
以下の3つの画像を準備します。ファイル名にも注意してください。"(ファイル名).scale-(サイズ).png"の形式になります。
sample.scale-80.png
248×120 Pixel

sample.scale-100.png
310×150 Pixel

sample.scale-140.png
434×210 Pixel

プロジェクトのルートに"images"ディレクトリを作成し、作成した画像を"images"ディレクトリ内に配置します。(下図参照)
UI
下図のUIを準備します。
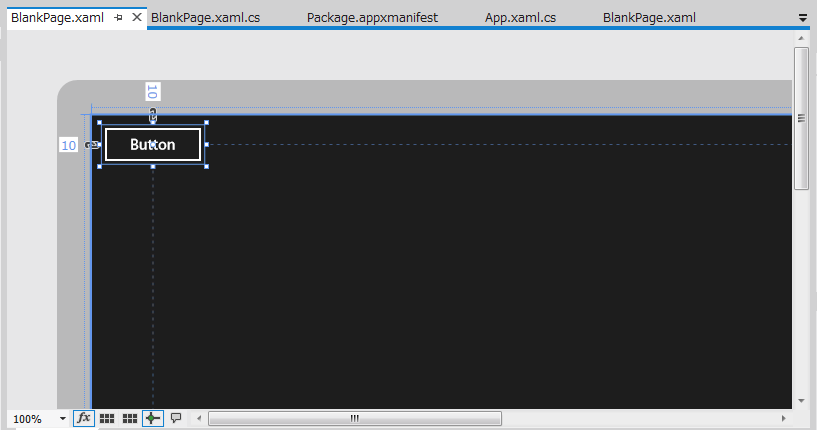
コード
以下のコードを記述します。実質はButtonのClickイベントハンドラを記述するのみです。
using System;
using System.Collections.Generic;
using System.IO;
using System.Linq;
using Windows.Foundation;
using Windows.Foundation.Collections;
using Windows.UI.Xaml;
using Windows.UI.Xaml.Controls;
using Windows.UI.Xaml.Controls.Primitives;
using Windows.UI.Xaml.Data;
using Windows.UI.Xaml.Input;
using Windows.UI.Xaml.Media;
using Windows.UI.Xaml.Navigation;
using Windows.Data.Xml.Dom;
using Windows.UI.Notifications;

// The Blank Page item template is documented at http://go.microsoft.com/fwlink/?LinkId=234238

namespace TileNotificationImage
{
  /// <summary>
  /// An empty page that can be used on its own or navigated to within a Frame.
  /// </summary>
  public sealed partial class BlankPage : Page
  {
    public BlankPage()
    {
      this.InitializeComponent();
    }

    /// <summary>
    /// Invoked when this page is about to be displayed in a Frame.
    /// </summary>
    /// <param name="e">Event data that describes how this page was reached.  The Parameter
    /// property is typically used to configure the page.</param>
    protected override void OnNavigatedTo(NavigationEventArgs e)
    {
    }

    private void Button_Click_1(object sender, RoutedEventArgs e)
    {
      XmlDocument content = new XmlDocument();

      string doc = "<title><visual version=\"1\" lang=\"en-US\">"
        + "<binding template=\"TileWideImage\">"
        + "<image id=\"1\" src=\"ms-appx:///images/sample.png\"/>"
        + "</binding>"
        + "</visual></title>";
      content.LoadXml(doc);

      Windows.UI.Notifications.TileNotification tileNotification
        = new Windows.UI.Notifications.TileNotification(content);

      TileUpdater tileUpdater = TileUpdateManager.CreateTileUpdaterForApplication();
      tileUpdater.Update(tileNotification);
    }
  }
}
解説
タイルにメッセージを表示する処理と同様の処理を実行します。(詳細は
こちら)
タイルへのメッセージを表示との違いは、タイル更新のXMLとXMLテンプレートが異なります。
<title>
  <visual version="1" lang="en-US">
    <binding template="TileWideImage">
      <image id="1" src="ms-appx:///images/sample.png"/>
    </binding>
  </visual>
</title>
というXMLをタイルに適用します。
ローカルのイメージを参照するため、imageタグ内のsrc属性は
ms-appx:///images/sample.png
と記述します。
実際に作成してimagesディレクトリに配置したファイルは
- sample.scale-80.png
- sample.scale-100.png
- sample.scale-140.png
の3ファイルですが、URIの指定は"/images/sample.png"となることに注意してください。
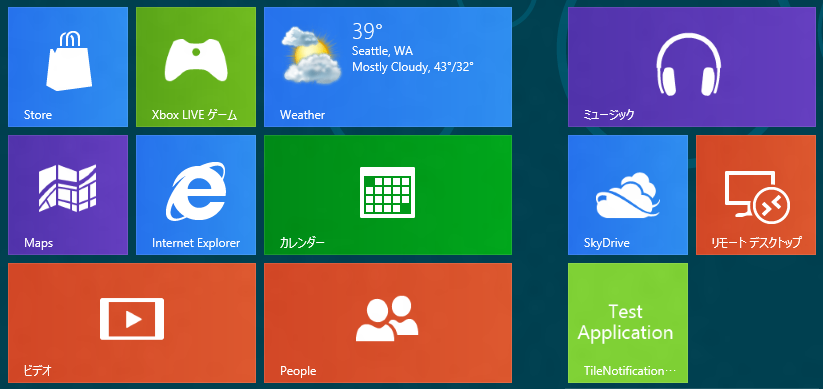
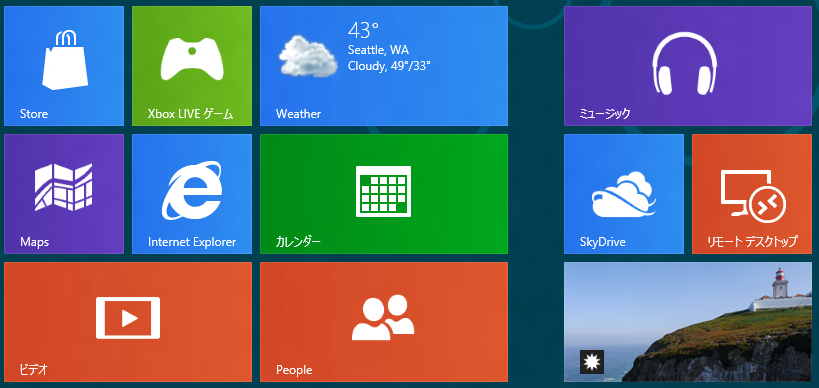
アプリケーション実行結果
アプリケーションを実行し、ボタンを押します。[Windows]キーを押しスタート画面に戻るとタイルに画像が表示されます。(下図参照)

タイルを小さくした場合は画像は表示されません。
ワイドタイルと通常のタイル両方に画像を表示する場合
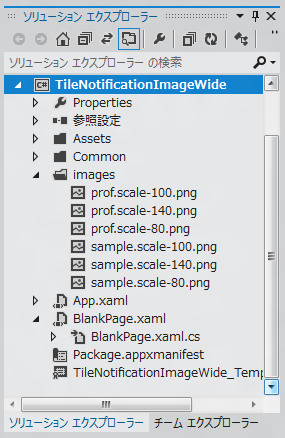
画像の準備
通常タイルに表示する画像を準備します。
prof.scale-80.png

prof.scale-100.png

prof.scale-140.png

ワイドタイル用の画像と同じくimageディレクトリに画像を配置します。
コードの変更
ボタンのClickイベントハンドラーを以下のように書き換えます。
private void Button_Click_1(object sender, RoutedEventArgs e)
{
  XmlDocument content = new XmlDocument();

  string doc = "<title><visual version=\"1\" lang=\"en-US\">"
    + "<binding template=\"TileSquareImage\">"
    + "<image id=\"1\" src=\"ms-appx:///images/prof.png\"/>"
    + "</binding>"
    + "<binding template=\"TileWideImage\">"
    + "<image id=\"1\" src=\"ms-appx:///images/sample.png\"/>"
    + "</binding>"
    + "</visual></title>";
  content.LoadXml(doc);

  Windows.UI.Notifications.TileNotification tileNotification
    = new Windows.UI.Notifications.TileNotification(content);

  TileUpdater tileUpdater = TileUpdateManager.CreateTileUpdaterForApplication();
  tileUpdater.Update(tileNotification);
}
<title>
  <visual version="1" lang="en-US">
    <binding template="TileSquareImage">
      <image id="1" src="ms-appx:///images/prof.png"/>
    </binding>
    <binding template="TileWideImage">
      <image id="1" src="ms-appx:///images/sample.png"/>
    </binding>
  </visual>
</title>
というXMLをタイルに適用します。
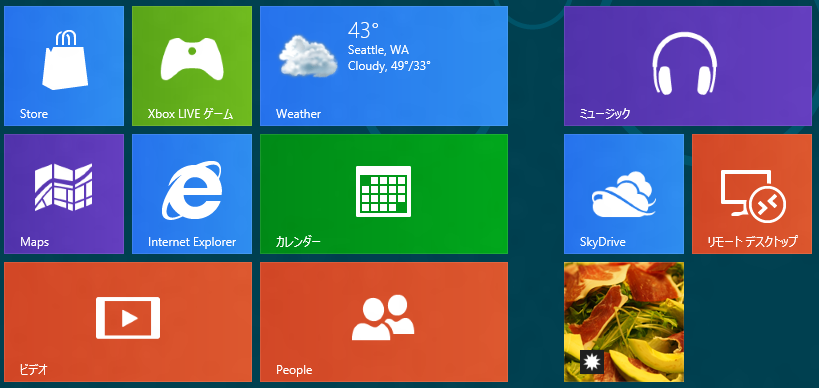
実行結果
アプリケーションを実行し、画面でボタンを押します。ホーム画面に戻ると、ワイドタイルが表示されており先ほど作成した画像がタイルに表示されています。
タイルを右クリックし、下部の[小さくする]メニューを選択します。タイルが小さくなり、通常のタイル用に作成した画像が表示されます。
著者
iPentecのメインプログラマー
C#, ASP.NET の開発がメイン、少し前まではDelphiを愛用
最終更新日: 2024-01-06
作成日: 2012-03-19
