ListBoxの指定した位置の要素を削除するコードを紹介します。
概要
ListBoxの指定した位置の要素を削除するには、ListBoxのItemsプロパティの RemoveAt メソッドを呼び出します。第一引数に削除する要素のインデックス番号を与えます。
書式
(リストボックスオブジェクト).Items.RemoveAt((削除するインデックス番号));
プログラム例
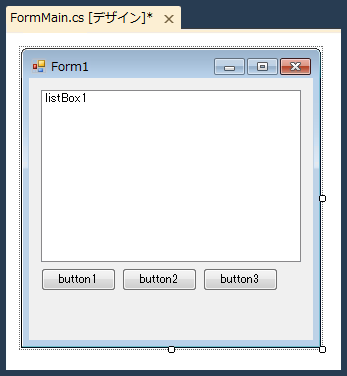
UI
以下のUIを作成します。ListBoxとButtonを配置します。(Buttonは3つ配置されていますが、button1,button2の2つを使用します。)
コード
以下のコードを記述します。
using System;
using System.Collections.Generic;
using System.ComponentModel;
using System.Data;
using System.Drawing;
using System.Linq;
using System.Text;
using System.Windows.Forms;

namespace ListBoxDemo
{
  public partial class FormMain : Form
  {
    public FormMain()
    {
      InitializeComponent();
    }

    private void button1_Click(object sender, EventArgs e)
    {
      listBox1.Items.Add("Line:1");
      listBox1.Items.Add("Line:2");
      listBox1.Items.Add("Line:3");
      listBox1.Items.Add("Line:4");
      listBox1.Items.Add("Line:5");
    }

    private void button2_Click(object sender, EventArgs e)
    {
      int sel = listBox1.SelectedIndex;
      listBox1.Items.RemoveAt(sel);
    }
  }
}
解説
button1
ListBoxに要素を5つ追加します。詳細は
こちらの記事を参照してください。
button2
ListBox.SelectedIndex プロパティを参照しListBoxで選択されている要素のインデックス番号を取得します。
int sel = listBox1.SelectedIndex;
ListBox.Items.RemoveAtメソッドを呼び出し要素を削除します。引数には削除する要素のインデックス番号を与えます。
listBox1.Items.RemoveAt(sel);
実行結果
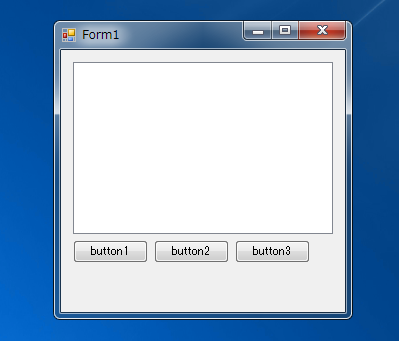
プロジェクトを実行します。下図のウィンドウが表示されます。
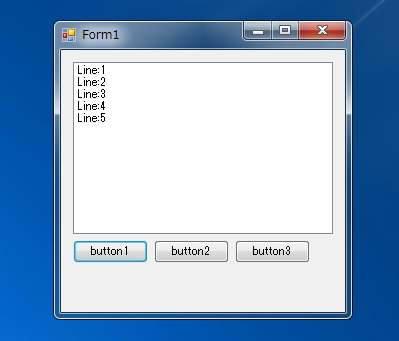
button1を押します。ListBoxに要素が追加されます。
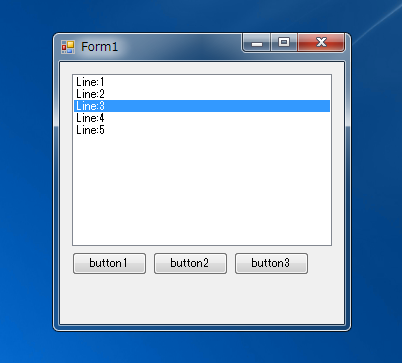
ListBoxの要素をクリックして選択します。下図は3番目の要素を選択した状態です。
button2を押します。選択した要素が削除されました。

著者
iPentecのメインプログラマー
C#, ASP.NET の開発がメイン、少し前まではDelphiを愛用
最終更新日: 2024-01-06
作成日: 2012-07-13
