Google Driveにフォルダーを作成する - C#
C#でGoogle Drive にフォルダーを作成するコードを紹介します。
事前準備
Google Drive API の有効化
Google Drive APIを有効化します。手順は
こちらの記事を参照してください。
Google APIのサービスアカウントを作成
Google APIのサービスアカウントを作成します。アカウントの作成手順は
こちらの記事
を参照してください。
Google API サービスアカウントの認証キーを作成
Google API サービスアカウントの認証キーを作成します。
作成の具体的な手順は
こちらの記事を参照してください。
今回はJSON形式のキーファイルを作成しています。
Google Driveの準備
Google Drive にログインし共有フォルダを作成し、先の手順で作成したサービスアカウントと共有します。
具体的な操作手順は
こちらの記事を参照して下さい。
C#プロジェクトの作成
C#のプロジェクトを作成します。今回はWindows Formアプリケーションを作成します。
作成したプロジェクトに Google.Apis.Drive.V3 パッケージをインストールします。
インストールの手順は
こちらの記事を参照してください。
プログラム
キーファイルの配置
プロジェクトフォルダにJSON形式で取得したキーファイルを配置します。プロパティウィンドウで[出力ディレクトリにコピー]のプロパティを
"常にコピーする"に設定して、ファイルが出力ディレクトリに配置される設定にします。
UI
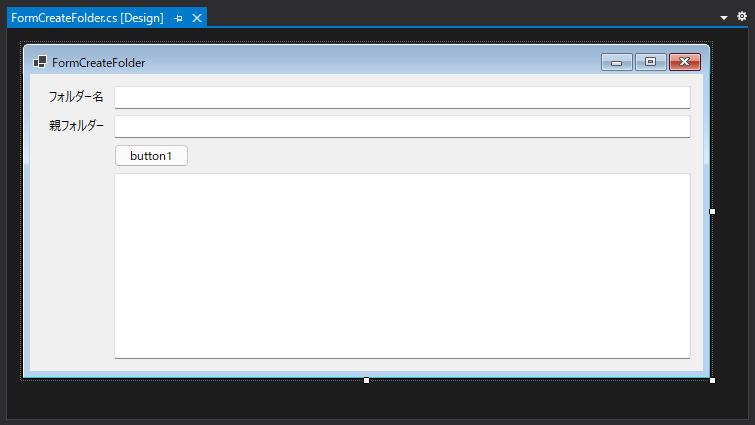
下図のフォームを作成します。ボタンとテキストボックスを2つ、複数行のテキストボックスを1つ配置します。
コード
下記のコードを記述します。button1 のClickイベントを実装しています。
using System;
using System.Collections.Generic;
using System.ComponentModel;
using System.Data;
using System.Drawing;
using System.Linq;
using System.Text;
using System.Threading.Tasks;
using System.Windows.Forms;
using Google.Apis.Drive.v3;
using System.IO;


namespace GoogleDriveOperation
{
  public partial class FormCreateFolder : Form
  {
    public FormCreateFolder()
    {
      InitializeComponent();
    }

    static string[] Scopes = { DriveService.Scope.Drive };


    private void button1_Click(object sender, EventArgs e)
    {
      FileStream fs = new FileStream("(JSON形式のキーファイルのパス)", FileMode.Open, FileAccess.Read);
      Google.Apis.Auth.OAuth2.GoogleCredential credential = Google.Apis.Auth.OAuth2.GoogleCredential.FromStream(fs).CreateScoped(Scopes);

      Google.Apis.Services.BaseClientService.Initializer init = new Google.Apis.Services.BaseClientService.Initializer();
      init.HttpClientInitializer = credential;
      init.ApplicationName = "My Test App";
      DriveService service = new DriveService(init);


      Google.Apis.Drive.v3.Data.File fobj = new Google.Apis.Drive.v3.Data.File();
      if (string.IsNullOrEmpty(textBox1.Text) == true) {
        fobj.Name = "New Folder";
      }
      else {
        fobj.Name = textBox1.Text;
      }

      fobj.MimeType = "application/vnd.google-apps.folder";

      if (string.IsNullOrEmpty(textBox2.Text) == false) {
        fobj.Parents = new List<string> { textBox2.Text };
      }

      FilesResource.CreateRequest req = service.Files.Create(fobj);
      req.Fields = "id, name";
      Google.Apis.Drive.v3.Data.File newfile = req.Execute();

      textBox3.Text = string.Format("{0} フォルダー(id={1})を作成しました。\r\n", newfile.Name, newfile.Id);
    }
  }
}
解説
認証やGoogle Driveのサービスオブジェクトの作成は
こちらの記事を参照してください。
  FileStream fs = new FileStream("(JSON形式のキーファイルのパス)", FileMode.Open, FileAccess.Read);
  Google.Apis.Auth.OAuth2.GoogleCredential credential = Google.Apis.Auth.OAuth2.GoogleCredential.FromStream(fs).CreateScoped(Scopes);

  Google.Apis.Services.BaseClientService.Initializer init = new Google.Apis.Services.BaseClientService.Initializer();
  init.HttpClientInitializer = credential;
  init.ApplicationName = "My Test App";
  DriveService service = new DriveService(init);
作成するフォルダーのファイルオブジェクトを作成します。
Nameプロパティに作成するフォルダ名を設定します。MimeTypeプロパティにはフォルダを作成するため
application/vnd.google-apps.folder を指定します。
フォルダの作成位置は、フォルダを配置する親フォルダのIDを Parents プロパティに設定します。
     Google.Apis.Drive.v3.Data.File fobj = new Google.Apis.Drive.v3.Data.File();
      if (string.IsNullOrEmpty(textBox1.Text) == true) {
        fobj.Name = "New Folder";
      }
      else {
        fobj.Name = textBox1.Text;
      }

      fobj.MimeType = "application/vnd.google-apps.folder";

      if (string.IsNullOrEmpty(textBox2.Text) == false) {
        fobj.Parents = new List<string> { textBox2.Text };
      }
Fileオブジェクトから、
FilesResource.CreateRequest オブジェクトを作成します。
作成したFilesResource.CreateReques オブジェクトの
Execute() メソッドを呼び出しフォルダーを作成します。
作成されたフォルダーの情報が Execute() メソッドの戻り値で返ります。作成されたたフォルダー名とフォルダーのIDをテキストボックスに表示します。
      FilesResource.CreateRequest req = service.Files.Create(fobj);
      req.Fields = "id, name";
      Google.Apis.Drive.v3.Data.File newfile = req.Execute();

      textBox3.Text = string.Format("{0} フォルダー(id={1})を作成しました。\r\n", newfile.Name, newfile.Id);
実行結果
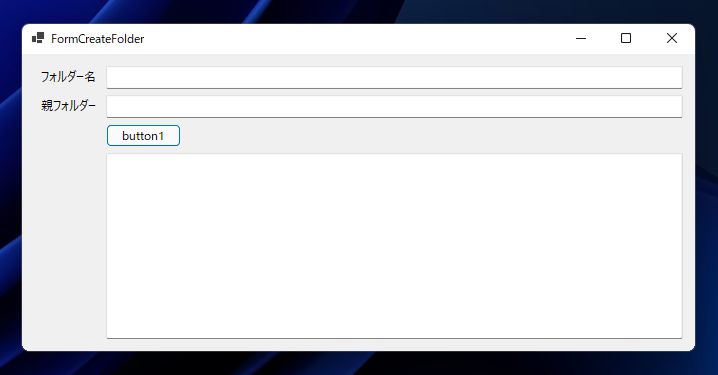
プロジェクトを実行します。下図のウィンドウが表示されます。
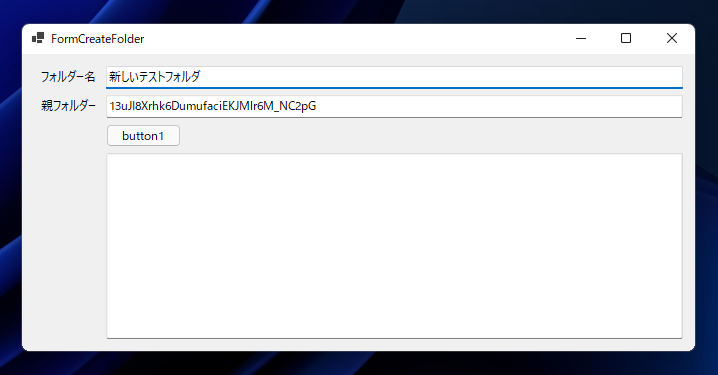
上部のテキストボックスに作成するフォルダーの名前を入力します。2つ目のテキストボックスには、作成するフォルダーを配置するフォルダーのIDを入力します。
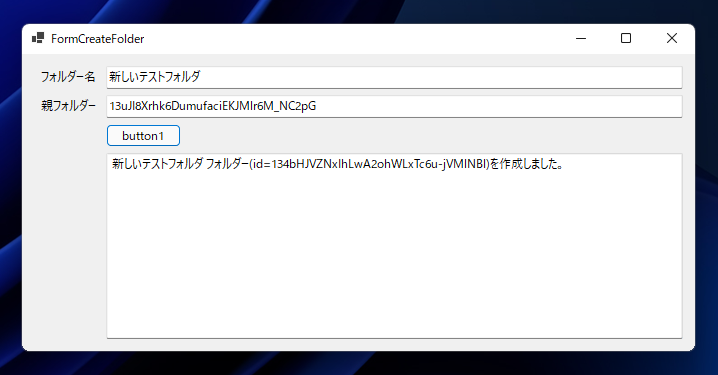
テキストボックス入力後[button1]ボタンをクリックします。Google Drvieにフォルダが作成され、作成されたフォルダの名前とIDがテキストボックスに表示されます。
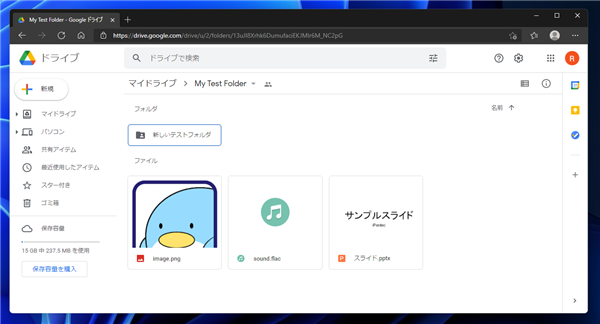
Google Drive で確認します。プログラムで指定したフォルダー名のフォルダーがGoogle Driveに作成されていることが確認できます。
著者
iPentecのメインプログラマー
C#, ASP.NET の開発がメイン、少し前まではDelphiを愛用


