TabHostを利用してタブによる画面切り替えを実装します。
アプリケーション作成情報
- ProjectName : TabHostDemo
- ApplicationName : TabHostDemo
- PackageName : com.iPentec.TabHostDemo
- Activity : MainActivity
- minSdkVersionは8 (Android 2.2) にしました
コード
activity_main.xml
プロジェクトの "/res/layout/activity_main.xml"を編集します。
<RelativeLayout xmlns:android="http://schemas.android.com/apk/res/android"
  xmlns:tools="http://schemas.android.com/tools"
  android:layout_width="match_parent"
  android:layout_height="match_parent"
  android:paddingBottom="@dimen/activity_vertical_margin"
  android:paddingLeft="@dimen/activity_horizontal_margin"
  android:paddingRight="@dimen/activity_horizontal_margin"
  android:paddingTop="@dimen/activity_vertical_margin"
  tools:context=".MainActivity" >


  <TabHost
    android:id="@android:id/tabhost"
    android:layout_width="match_parent"
    android:layout_height="match_parent"
    android:layout_alignParentLeft="true"
    android:layout_alignParentTop="true" >

    <LinearLayout
      android:layout_width="match_parent"
      android:layout_height="match_parent"
      android:orientation="vertical" >

      <TabWidget
        android:id="@android:id/tabs"
        android:layout_width="match_parent"
        android:layout_height="wrap_content" >
      </TabWidget>

      <FrameLayout
        android:id="@android:id/tabcontent"
        android:layout_width="match_parent"
        android:layout_height="match_parent"
        android:orientation="vertical">

        <LinearLayout
          android:id="@+id/tab1"
          android:layout_width="match_parent"
          android:layout_height="match_parent"
          android:orientation="vertical">

          <TextView
            android:id="@+id/textView1"
            android:layout_width="wrap_content"
            android:layout_height="wrap_content"
            android:text="TextView-タブ1" />

        </LinearLayout>

        <LinearLayout
          android:id="@+id/tab2"
          android:layout_width="match_parent"
          android:layout_height="match_parent"
          android:orientation="vertical">

          <TextView
            android:id="@+id/textView2"
            android:layout_width="wrap_content"
            android:layout_height="wrap_content"
            android:text="TextView-タブ2" />
        </LinearLayout>

        <LinearLayout
          android:id="@+id/tab3"
          android:layout_width="match_parent"
          android:layout_height="match_parent"
          android:orientation="vertical">

          <TextView
            android:id="@+id/textView3"
            android:layout_width="wrap_content"
            android:layout_height="wrap_content"
            android:text="TextView-タブ3" />
        </LinearLayout>
      </FrameLayout>
    </LinearLayout>
  </TabHost>

</RelativeLayout>
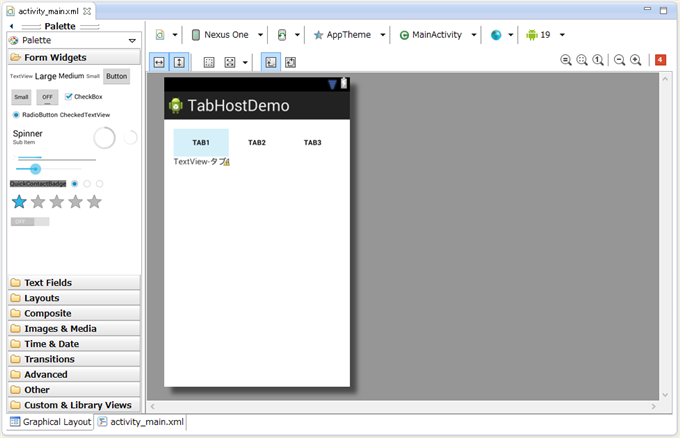
デザイナーでの外観
上記コードをビジュアルデザイナーで確認すると下図の画面として表示されます。
MainActivity.java
プロジェクトの "/src/"ディレクトリ内のアプリケーションの名前空間にある"MainActivity.java"を編集します。
package com.iPentec.tabhostdemo;

import android.os.Bundle;
import android.app.Activity;
import android.view.Menu;
import android.widget.TabHost;
import android.widget.TabHost.TabSpec;

public class MainActivity extends Activity{

  @Override
  protected void onCreate(Bundle savedInstanceState) {
    super.onCreate(savedInstanceState);
    setContentView(R.layout.activity_main);

    //TabHostオブジェクト取得
    TabHost tabhost = (TabHost)findViewById(android.R.id.tabhost);
    tabhost.setup();

    TabSpec tab1 = tabhost.newTabSpec("tab1");
    tab1.setIndicator("タブ1");
    tab1.setContent(R.id.tab1);
    tabhost.addTab(tab1);

    TabSpec tab2 = tabhost.newTabSpec("tab2");
    tab2.setIndicator("タブ2");
    tab2.setContent(R.id.tab2);
    tabhost.addTab(tab2);

    TabSpec tab3 = tabhost.newTabSpec("tab3");
    tab3.setIndicator("タブ3");
    tab3.setContent(R.id.tab3);
    tabhost.addTab(tab3);

    tabhost.setCurrentTab(0);

  }

  @Override
  public boolean onCreateOptionsMenu(Menu menu) {
    // Inflate the menu; this adds items to the action bar if it is present.
    getMenuInflater().inflate(R.menu.main, menu);
    return true;
  }

}
解説
TabHost tabhost = (TabHost)findViewById(android.R.id.tabhost);
にてアプリケーションのリソースIDからTabHostオブジェクトを取得します。
tabhost.setup();
にてタブのセットアップを開始します。
  TabSpec tab1 = tabhost.newTabSpec("tab1");
  tab1.setIndicator("タブ1");
  tab1.setContent(R.id.tab1);
  tabhost.addTab(tab1);

  TabSpec tab2 = tabhost.newTabSpec("tab2");
  tab2.setIndicator("タブ2");
  tab2.setContent(R.id.tab2);
  tabhost.addTab(tab2);

  TabSpec tab3 = tabhost.newTabSpec("tab3");
  tab3.setIndicator("タブ3");
  tab3.setContent(R.id.tab3);
  tabhost.addTab(tab3);
上記コードにてTabHostにタブを追加します。今回は3つタブを追加します。
tabhost.setCurrentTab(0);
デフォルトで選択するタブを指定します。引数に0を与えているため最初のタブ(タブ1)がデフォルトで選択されます。
注意
IndicatorやContentは設定が必須です。下記のコードでは"you must specify a way to create tab indicator"のエラーが発生しアプリケーションの実行ができません。
パターン1、パターン2、パターン3いづれも実行できません。
java.lang.RuntimeException: Unable to start activity ComponentInfo{プロジェクトの名前空間/アクティビティーのフルネーム}: java.lang.IllegalArgumentException: you must specify a way to create the tab content
のエラーになります。
パターン1
  TabSpec tab1 = tabhost.newTabSpec("tab1");
  tab1.setIndicator("タブ1");
  tab1.setContent(R.id.tab1);
  tabhost.addTab(tab1);

  TabSpec tab2 = tabhost.newTabSpec("tab2");
  tab1.setIndicator("タブ2");//うっかりミス
  tab2.setContent(R.id.tab2);
  tabhost.addTab(tab2);
パターン2
  TabSpec tab1 = tabhost.newTabSpec("tab1");
  tab1.setIndicator("タブ1");
  tab1.setContent(R.id.tab1);
  tabhost.addTab(tab1);

  TabSpec tab2 = tabhost.newTabSpec("tab2");
  tab2.setIndicator("タブ2");
  tab2.setContent(R.id.tab1);//うっかりミス
  tabhost.addTab(tab2);
パターン3
  TabSpec tab1 = tabhost.newTabSpec("tab1");
  tab1.setIndicator("タブ1");
  tab1.setContent(R.id.tab1);
  tabhost.addTab(tab1);

  TabSpec tab2 = tabhost.newTabSpec("tab2");
  tab1.setIndicator("タブ2");
  tabhost.addTab(tab2);
実行結果
アプリケーションを実行すると下図の画面が表示されます。
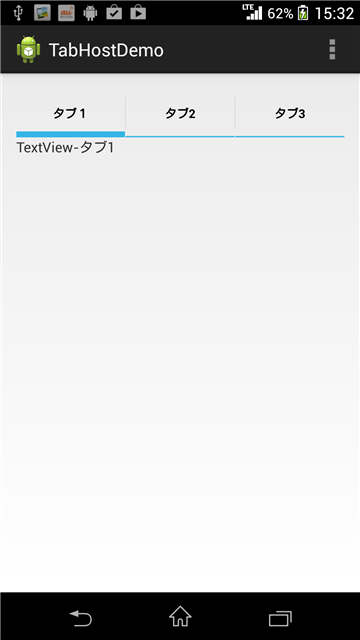
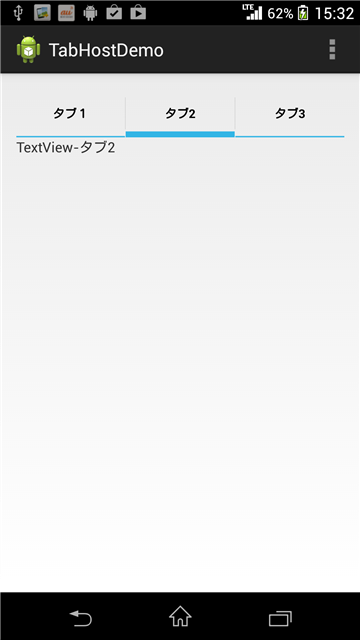
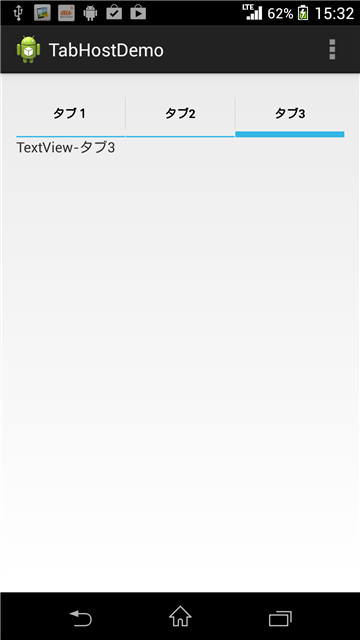
タブをタップするとタブを切り替えられます。タブの下部のViewの内容も変わっていることを確認してください。
[タブ3]をタップした場合も同様です。
著者
iPentecのプログラマー、最近はAIの積極的な活用にも取り組み中。
とっても恥ずかしがり。
最終更新日: 2024-01-04
作成日: 2013-12-02
